
Imagine the flow of liquid velvet—smooth, continuous, yet firm enough to hold shape. That’s what you are aiming for when perfecting your mehndi paste consistency. One wrong move, and lines can blur, crack, or fail to stain deeply.
We all know the moment. Hours of work, intricate bridal motifs, delicate Jaali patterns—and then a finger slips, a line bleeds, or the paste cracks mid-design. Your masterpiece looks messy, and the rich stain you promised? Half as dark, uneven, disappointing.
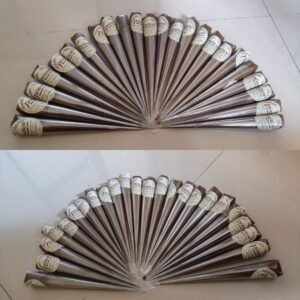
Master this with Professional Cones
The same products used in this guide are available in our shop.
I’ve spent decades teaching artists in India, from small towns to high-profile bridal studios. If there’s one secret that separates a novice from a master, it’s not talent, not speed—it’s mehndi paste consistency. The way your paste flows, stretches, and sets directly controls line sharpness, hand comfort, and final stain quality.
Imagine the flow of liquid velvet—smooth, continuous, yet substantial enough to hold its form. That’s what we’re aiming for.
Inside this Guide:

💡 Lesson One: Decoding the Science of Flow
Before we dive into fixes, let’s talk science, but practically.
- Rheology: The study of flow. Every squeeze of your cone interacts with rheological principles.
- Viscosity: Measures thickness or resistance to flow. Too low, your paste bleeds. Too high, it resists the cone tip.
- Thixotropy: The magic that makes your life easier. It allows the paste to flow smoothly under cone pressure and set instantly on the skin, reducing hand strain while keeping lines sharp.
Practical takeaway: Thixotropy ensures comfort, control, and sharpness simultaneously. It’s why top Indian mehndi artists can spend hours creating intricate bridal designs without fatigue.
Buy Mehndi Cones Pack of 24 – Natural, Organic & Dark Stain
🌿 Lesson Two: Why Your Lines Blur (And How Paste Consistency Is the Culprit)
Let’s link this directly to outcomes. Perfect consistency creates a high Henna Dome, forming a paste mound that stays in place long enough to transfer a dark, long-lasting stain. This is critical in Bridal Henna and Karva Chauth designs, where every tiny dot and swirl counts.
When paste bleeds, cracks, or sputters, it’s usually a failure of Thixotropic behavior. Your paste either flows too freely or refuses to move, betraying your handwork.
🛠️ The Henna Dome & Stringiness Test: A Masterclass Tool
Every seasoned artist uses this simple but revealing test:
- Lift a small portion of paste slowly.
- The string should extend 1/4 to 1/2 inch before breaking cleanly.
- The dome should sit firm, showing paste is balanced.
Failing this test predicts disaster: lines will smear or crumble, and the final stain will be inconsistent. It’s a simple, visual check that separates amateurs from pros.

Buy Mehndi Cones Pack of 12 – Natural, Organic & Dark Stain
🛠️ Lesson Three: Fixing Common Mehndi Paste Problems
Even the best artists face paste issues. The difference is knowing exactly how to fix them.
1. Why Does My Mehndi Paste Bleed?
Runny paste spreads instantly, blurring your intricate lines. Often, the viscosity is too low or too much liquid has been added.
Step-by-step fix:
- Isolate the paste portion.
- Add 1/2 tsp finely sifted henna powder.
- Mix slowly for 2 minutes.
- Wait 15 minutes for absorption.
- Retest using the Henna Dome & Stringiness Test.
2. Why Does My Mehndi Paste Crack or Break?
Stiff paste refuses to flow. Pressure from your hand forces uneven lines, leaving broken, scratchy patterns.
Step-by-step fix:
- Add 1 tsp lemon juice or distilled water gradually.
- Mix thoroughly to smooth texture.
- Rest paste for 10 minutes.
- Test string and dome length again.
3. Why Does My Mehndi Cone Clog or Sputter?
Lumps in paste create inconsistent flow. Powder grit or undissolved sugar is usually the culprit.
Step-by-step fix:
- Strain paste through muslin cloth or nylon stocking.
- Remove undissolved particles.
- Refill cones carefully.
Master Tip: Successfully executing these fixes directly addresses poor mehndi cone consistency, ensuring lines stay laser-sharp and your stain rich and uniform.
🌿 Lesson Four: Ingredients That Define Perfect Mehndi Paste
| Ingredient | Role | Practical Insight |
| Henna Powder | Body | Triple/quadruple sifted for smooth flow |
| Acidic Liquid (Lemon Juice/Water) | Solvent / Activates Dye | Controls viscosity; too much causes bleeding |
| Sugar/Jaggery/Glycerin | Humectant / Thickener | Improves adhesion, stringiness, and dome stability |
| Essential Oils (Clove/Eucalyptus) | Stain Enhancer / Terpene | Boosts stain; measure carefully to avoid thinning paste |
Pro Tip: Always check consistency after resting; aging paste behaves differently than fresh paste.
💡 Lesson Five: The Professional’s Flow Checklist
- Cone Rolling: Tight rolls and small tips = finest lines.
- Hand Pressure: Let Thixotropy do the work. Minimal squeezing is ideal.
- Dye Release: Retest paste after resting. Tiny adjustments save hours of mistakes.
Quick Reference: Ideal Mehndi Paste
- Texture: Thick yogurt texture
- String length: 1/4–1/2 inch
- Henna Dome: remains firm without spreading
Step-by-step fix for runny paste:
- Add sifted henna powder gradually.
- Mix gently.
- Rest 15 minutes.
- Retest dome and string.
🌟 Closing Masterclass Insight
The truth is simple: Your paste is the invisible artist behind every sharp line and dark stain. Talent alone cannot fix poor flow.
Master Rheology, Viscosity, and Thixotropy. Respect your ingredients. Test consistently. Adjust patiently. These principles turn every design into a professional-quality masterpiece.
Remember: Every raised dome, every perfectly stretched string, every uninterrupted line tells your audience—you are a master of the craft.
More Design Inspiration


