
Trying to draw your first henna line often feels like wrestling with a floppy funnel. The cone bends, the paste sputters, and your beautiful design ends up messy. Every beginner knows this struggle.
The truth is simple: the cone you choose is as important as your skill level. A tightly rolled, firm cone with a medium tip and creamy natural henna paste can turn frustration into success from the very first attempt. Let’s explore beginner-friendly mehndi cones and why these small tools make a huge difference, especially for Indian artists practicing Bridal Henna or regional designs like Raja Rani motifs and Jaali Work.
Master this with Professional Cones
The same products used in this guide are available in our shop.

🛠️ Starting Right: Why the Cone You Choose Matters More Than Your First Design
The ideal beginner cone must meet three criteria to ensure immediate success:
1. Material and Firmness:
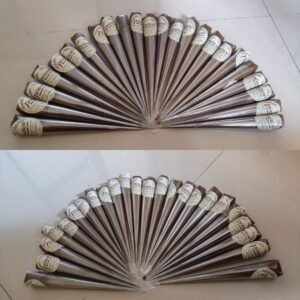
Choose Thick Cellophane (Mylar) or Plastic cones (often labeled as Dulhan Cones) for maximum grip and minimal wobble. This improves Flow Control, reduces hand fatigue, and ensures consistent paste output.
Inside this Guide:
2. Tip Size:
Opt for a Medium Tip (0.4 mm to 0.5 mm, equivalent to 23–24 gauge). This size prevents clogging while delivering clear, visible lines that are perfect for practice and simple designs.
3. Paste Consistency:
The cone must be filled with Medium-Viscosity Natural Henna Paste (like thick cake batter or lightly whipped cream) to ensure smooth, predictable output without bleeding or breaking.
Buy Mehndi Cones Pack of 24 – Natural, Organic & Dark Stain
Mastering these three factors guarantees your first designs look neat and controlled, setting the foundation for a confident mehndi journey.
💡 Lesson One: The Beginner’s Toolkit – Anatomy of the Ideal Cone
The Importance of Cone Material (Cellophane vs. Plastic)
- Cellophane Cone: Made from smooth, clear Mylar film. Provides firm grip, stable flow, and minimal bend under pressure.
- Plastic Cone: Slightly thicker, still provides firm control for beginners.
- Avoid flimsy paper cones—they bend easily and reduce Flow Control, causing paste sputtering.
Many Indian artists refer to these as Dulhan Cones, especially used in bridal preparations. Using them helps beginners manage intricate designs like Raja Rani or floral motifs effectively.
Tip Size: The Sweet Spot (0.4 mm – 0.5 mm)
Tiny tips (0.2 – 0.3 mm) clog easily, while large tips (>0.6 mm) produce messy lines.
Technical authority: 0.4 mm – 0.5 mm corresponds to 23–24 gauge tips, delivering predictable paste flow and enhanced Flow Control.
Buy Mehndi Cones Pack of 24 – Natural, Organic & Dark Stain
Cone Filling and Rolling
Tightly rolled cones provide consistent paste flow. Loose cones deform under pressure, making practice difficult. Beginners gain confidence and Flow Control when using properly rolled cones.
🌿 Lesson Two: Should Beginners Use Ready-Made Cones? (Natural vs. Chemical)
Safety First: Avoid Instant/Black Henna
Cheap, fast-staining cones contain PPD, which can cause allergic reactions, burns, or uneven stains. Avoid these entirely. Safety is essential for beginners, especially practicing at home or in workshops.
The Natural Henna Advantage
Natural cones include henna, sugar, lemon juice, and essential oils. They flow predictably, produce rich brown stains, and are safe. Reputable Indian brands include Jamila, Rajni Henna, and Mehandi Magic.
Medium-Viscosity Paste should resemble thick cake batter or lightly whipped cream, allowing smooth lines and predictable Flow Control.
🖊️ Lesson Three: Mastering Grip and Pressure
The Pencil Grip vs. Fist Grip
- Pencil Grip: Best for detailed designs and Jaali Work. Ideal for beginners to gain control.
- Fist Grip: For covering large areas quickly, requires advanced Flow Control.
Pressure Control: The Single Most Important Skill
Apply consistent, light pressure. Too much pressure thickens lines; too little stops flow. Beginners often underestimate the effect of steady pressure on Flow Control.
Quick Practice Routine for Beginners
- Place a laminated sheet, glass, or acetate sheet on your workspace.
- Hold the cone with a firm pencil grip, top seam rolled tightly.
- Squeeze evenly for 5 seconds, keeping line thickness uniform.
- Repeat across the page, focusing on consistent Flow Control.
- Inspect lines and adjust tip pressure as needed.
This routine builds hand confidence, Flow Control, and muscle memory quickly.
🌸 Lesson Four: Moving Beyond Beginner Cones
Once consistent lines are achieved with a 0.4–0.5 mm tip, you can experiment with:
- Smaller Tips (0.3–0.2 mm): For delicate bridal henna or intricate floral patterns.
- Homemade Cones: Rolling your own allows custom paste consistency and refined Flow Control.
Progressing this way ensures you transition smoothly from beginner to skilled artist.
❓ How Do I Prevent My Cone from Tearing or Bursting?
Tearing is usually caused by holding the cone too loosely or squeezing from the middle. Always roll the top seam tightly and maintain even pressure. This simple adjustment dramatically improves success for beginners.
✅ Beginner’s Recommended Mehndi Cone Checklist
| Feature | Recommendation | Practical Insight |
| Material | Thick Cellophane/Mylar or Plastic (Dulhan Cones) | Firm grip, reduces wobble, enhances Flow Control |
| Tip Size | 0.4 mm – 0.5 mm (23–24 gauge) | Ideal for visible, unclogged lines |
| Paste Consistency | Medium-Viscosity Natural Henna | Smooth flow like cake batter, prevents bleeding |
| Grip Style | Pencil Grip | Maximum control for detailed patterns |
| Practice Surface | Laminated Paper, Glass, Acetate | Easy cleanup, repeatable practice |
🌟 Conclusion and Call to Action
Starting with the right cone sets you up for success. Firm material, medium tip, and medium-viscosity natural paste make learning easier and more rewarding. Mastering Flow Control, grip, and pressure ensures clean, professional lines from your first design.
The perfect beginner cone is your key to confidence, precision, and the joy of creating beautiful mehndi designs with ease.
More Design Inspiration


