
Step-by-Step Cone Rolling Tutorial for Beginners is the foundation of every successful mehndi artist’s journey. Before mastering bridal mehndi, Arabic patterns, or intricate mandala grids, you must first learn how to roll a flawless cone. Smooth cone structure determines line precision, paste flow, and overall design quality.
Many beginners struggle not because of poor artistic skill, but because of poorly rolled cones. Air gaps, uneven tips, and loose seams create inconsistent henna application. This guide explains every technical detail so you can build professional-level cone preparation skills from day one.
Master this with Professional Cones
The same products used in this guide are available in our shop.

Why Cone Rolling Matters in Mehndi Art
A mehndi cone is not just a tool. It acts as the delivery system for your design.
Improperly rolled cones cause:
Inside this Guide:
- Sudden paste bursts
- Broken paisley curves
- Uneven line thickness
- Clogged tips
- Weak symmetry control
Bridal mehndi demands fine detailing. Arabic designs require smooth, flowing strokes. Even minimalist finger trails depend on consistent pressure.
Professional results begin at the cone.
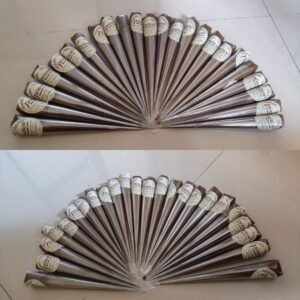
Buy Mehndi Cones Pack of 24 – Natural, Organic & Dark Stain
Materials Required for Step-by-Step Cone Rolling Tutorial for Beginners
Before starting this Step-by-Step Cone Rolling Tutorial for Beginners, gather proper materials.
Essential Supplies
- Thin cellophane sheets
- Sharp precision scissors
- Transparent tape
- Rubber bands
- Prepared henna paste
- Tissue paper for testing
Avoid thick plastic sheets. Thin material rolls tighter and prevents internal air gaps.
Understanding Cone Structure Before Rolling
A well-rolled mehndi cone has:
- A sharp pointed tip
- A narrow internal channel
- Even seam alignment
- Secure closure at the top
Each structural element affects henna flow consistency.
Buy Mehndi Cones Pack of 24 – Natural, Organic & Dark Stain
Beginners often ignore seam alignment. That mistake causes air pockets and leakage.
Step-by-Step Cone Rolling Tutorial for Beginners – Core Rolling Process
Follow this professional method carefully.
Step 1: Cut the Plastic Sheet Correctly
Cut a rectangular sheet approximately:
- 6–7 inches wide
- 8–9 inches long
Uniform dimensions create consistent cone size.
Step 2: Create the Initial Fold
Place the sheet flat on a clean surface.
Hold one corner firmly.
Begin folding diagonally to form a triangular shape.
Precision at this stage determines final tip sharpness.
Step 3: Roll the Tip Tightly
This step defines the entire cone performance.
While following this Step-by-Step Cone Rolling Tutorial for Beginners:
- Roll slowly
- Keep tension consistent
- Ensure no gaps at the tip
- Align edges smoothly
The tip must feel sharp and compact.
Loose rolling creates hollow internal space.
Step 4: Align the Seam Properly
Overlap edges evenly.
Check for:
- Smooth outer surface
- No wrinkles
- No internal folds
Seam alignment prevents leakage during henna application.
Step 5: Secure with Tape
Apply transparent tape along the seam.
Do not over-tape.
Excess tape makes the cone bulky.
Minimal secure taping works best.
Filling the Cone After Rolling
Rolling is only half the process.
Correct filling ensures smooth flow.
Professional Filling Method
- Use a piping bag
- Fill from bottom upward
- Leave top space for sealing
- Avoid overfilling
Overfilled cones collapse under pressure.
Underfilled cones lose stability.
Step-by-Step Cone Rolling Tutorial for Beginners – Sealing Technique
After filling:
- Press paste gently downward
- Remove trapped air
- Fold top flap tightly
- Secure with tape or rubber band
Air removal before sealing improves flow consistency.
Common Beginner Mistakes in Cone Rolling
Beginners often struggle due to avoidable errors.
Frequent Issues
- Rolling too loosely
- Using thick plastic
- Cutting uneven sheets
- Overfilling cones
- Ignoring air pockets
- Cutting tip too large
Every mistake affects design precision.
Comparison: Good Cone vs Poorly Rolled Cone
| Feature | Properly Rolled Cone | Poorly Rolled Cone |
|---|---|---|
| Tip Sharpness | Precise | Blunt |
| Internal Air | Minimal | Excess |
| Flow Stability | Smooth | Interrupted |
| Seam Strength | Secure | Leaky |
| Pressure Control | Balanced | Unstable |
A well-rolled cone enhances confidence during application.
Cutting the Tip – Angle Matters
After completing this Step-by-Step Cone Rolling Tutorial for Beginners, cutting the tip correctly is essential.
Recommended Cutting Angles
| Design Type | Suggested Angle | Reason |
|---|---|---|
| Bridal detailing | 30° | Fine lines |
| Arabic patterns | 45° | Balanced flow |
| Bold festive designs | 45–60° | Thick strokes |
Small cuts are safer.
You can always trim more later.
Practice Drills After Cone Preparation
Practice strengthens muscle memory.
Try these exercises:
- Straight line consistency
- Circular mandala outlines
- Arabic petal flow
- Paisley repetition
- Meshwork grids
Test cones on tissue before applying to skin.
Cultural Importance of Proper Cone Rolling
Mehndi carries deep cultural symbolism across India, Pakistan, and the Middle East.
Bridal mehndi represents blessings, prosperity, and celebration.
Rajasthani designs include dense filling.
Gujarati styles emphasize symmetry.
Arabic patterns showcase bold florals.
Precision in cone rolling protects these cultural aesthetics.
Respecting preparation reflects respect for tradition.
Step-by-Step Cone Rolling Tutorial for Beginners – Environmental Awareness
Temperature affects paste behavior.
Environmental Impact Table
| Condition | Effect | Adjustment |
|---|---|---|
| High humidity | Plastic softens | Use firm sheets |
| Heat | Paste thins | Cut smaller tip |
| Cold | Paste thickens | Roll tightly |
Professional artists adapt to environment.
Advanced Tips for Smoother Rolling
As you refine this Step-by-Step Cone Rolling Tutorial for Beginners, apply these advanced insights:
- Roll cones in batches
- Prepare cones 24 hours before booking
- Store upright in airtight container
- Avoid stacking horizontally
- Check seam strength before use
Consistency builds reliability.
Integration with Bridal and Arabic Design Execution
A perfectly rolled cone enhances:
- Mandala symmetry
- Portrait detailing
- Micro floral accuracy
- Negative space control
- Clean fingertip finishing
Cone quality directly impacts stain placement and design clarity.
Poor cone preparation weakens even the most beautiful design concepts.
Professional Workflow Summary
Successful mehndi artists follow this system:
- Prepare smooth henna paste
- Cut uniform sheets
- Roll tightly
- Secure seam
- Fill carefully
- Remove air
- Seal properly
- Test flow
- Adjust tip
This systematic approach eliminates performance surprises.
Long-Term Benefits of Mastering Cone Rolling
Artists who master this Step-by-Step Cone Rolling Tutorial for Beginners gain:
- Greater design control
- Faster execution speed
- Reduced paste wastage
- Stronger bridal portfolios
- Higher client satisfaction
Foundational skills elevate artistic confidence.
Frequently Asked Questions
1. How long does it take to master cone rolling?
Most beginners improve significantly after 15–20 practice cones.
2. Why does my cone leak from the side?
Leakage usually results from loose seam alignment or insufficient taping.
3. How sharp should the cone tip be before cutting?
The rolled tip should feel tight and pointed before trimming.
4. Can beginners use pre-made cones instead?
Pre-made cones help temporarily, but learning rolling builds professional independence.
5. Does cone rolling affect stain darkness?
Indirectly yes. Smooth flow ensures even paste placement, which supports consistent stain development.
Final Thoughts
Step-by-Step Cone Rolling Tutorial for Beginners forms the technical backbone of professional mehndi artistry. Mastering this skill improves line precision, enhances bridal detailing, and supports flawless Arabic flow patterns.
Strong foundations create lasting artistic growth. Invest time in refining your cone preparation process and watch your mehndi designs transform with smoother control and elevated precision.
More Design Inspiration


